- Published on
How to Restore the Classic Windows 10 Context Menu in Windows 11
- Authors

- Name
- Khalil
- @Im_Khalil
When Microsoft introduced Windows 11, one of the most polarizing visual overhauls was the redesigned right-click context menu. While the new menu looks modern with rounded corners and simplified action icons (cut, copy, rename, delete), it severely compromised power-user productivity.
Most third-party shell integrations—such as 7-Zip, WinRAR, Notepad++, Git Bash, VS Code, and media converters—were hidden behind a secondary "Show more options" button or locked behind the Shift + F10 keyboard shortcut.
If you want the instant, full-featured classic Windows 10 context menu back permanently with all your favorite tools available in a single right-click, here is how to restore it using a simple registry tweak.
Method 1: The Fast Way (Command Prompt / PowerShell)
This is the fastest method and takes less than 10 seconds. You do not need administrative privileges because this override is applied specifically to your current user account (HKCU).
Step 1: Open Terminal
Press Win + X and select Terminal, PowerShell, or Command Prompt (or press Win + R, type cmd, and hit Enter).
Step 2: Run the Registry Command
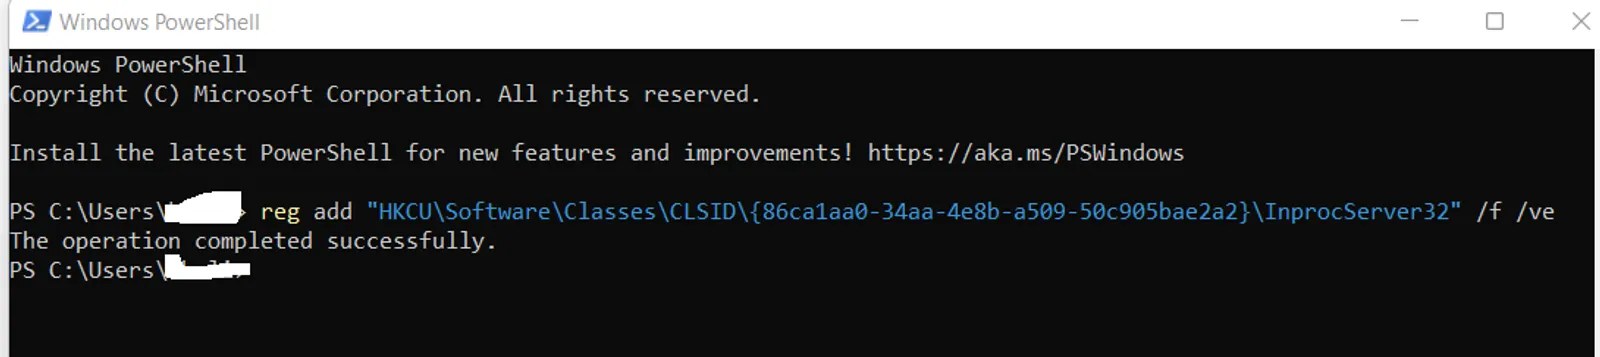
Copy and paste the following command into your terminal, then press Enter:
reg add "HKCU\Software\Classes\CLSID\{86ca1aa0-34aa-4e8b-a509-50c905bae2a2}\InprocServer32" /f /ve
You should see the confirmation message:The operation completed successfully.
Step 3: Apply the Change Immediately (No Reboot Needed)
Instead of rebooting your entire computer, you can simply restart Windows Explorer to see the classic context menu right away.
Run this one-liner command in your terminal:
taskkill /f /im explorer.exe && start explorer.exe
Your taskbar will briefly refresh, and your classic Windows 10 context menu will now appear immediately whenever you right-click on files, folders, or the desktop!
Method 2: Manual Registry Editor (GUI Method)
If you prefer navigating the Windows Registry Editor manually:
- Press
Win + R, typeregedit, and hit Enter to open Registry Editor. - Navigate to the following key path in the address bar:
HKEY_CURRENT_USER\Software\Classes\CLSID - Right-click on the
CLSIDfolder, select New > Key, and name it:{86ca1aa0-34aa-4e8b-a509-50c905bae2a2} - Right-click on the newly created
{86ca1aa0-34aa-4e8b-a509-50c905bae2a2}key, select New > Key, and name this subkey:InprocServer32 - Select the
InprocServer32key. In the right pane, double-click on the (Default) value, ensure the value data is blank/empty, and click OK. - Restart your PC or restart
explorer.exevia Task Manager.
How to Revert Back to the Default Windows 11 Context Menu
If you ever change your mind and want to restore the default Windows 11 context menu, you can easily delete the registry key:
- Open Command Prompt or PowerShell.
- Run the following command and press Enter:
reg delete "HKCU\Software\Classes\CLSID\{86ca1aa0-34aa-4e8b-a509-50c905bae2a2}" /f
- Restart Windows Explorer:
taskkill /f /im explorer.exe && start explorer.exe
Bonus: Temporary Shortcut Without Registry Changes
If you don't want to modify the registry but occasionally need the old context menu:
Shift + F10: Select any file and pressShift + F10to immediately open the classic menu.Shift + Right-Click: In newer builds of Windows 11 (22H2 / 23H2 / 24H2), holding down theShiftkey while right-clicking opens the classic full context menu directly.
Summary & Safety
Modifying user-level CLSID keys under HKEY_CURRENT_USER is completely safe, does not modify core system files, and can be reverted at any time in seconds. It remains fully compatible across all major Windows 11 updates.